The Ultimate Guide to Using a Book Embosser: Make Your Mark with Style
For book lovers and collectors alike, marking a book as your own can feel like a deeply personal and creative expression. I remember the first time I embossed my favorite book—it felt like I had truly made it a part of me. A book embosser adds a touch of sophistication and uniqueness to your collection, giving each book a special mark that symbolizes ownership. Whether you're looking to personalize your library, add a thoughtful touch to a gift, or bring a professional vibe to your collection, a book embosser is the perfect tool.In this guide, we’ll dive deep into how to use a book embosser. From how to use and assemble them to where to emboss for the best effect, we’ve got you covered!
What is a Book Embosser?
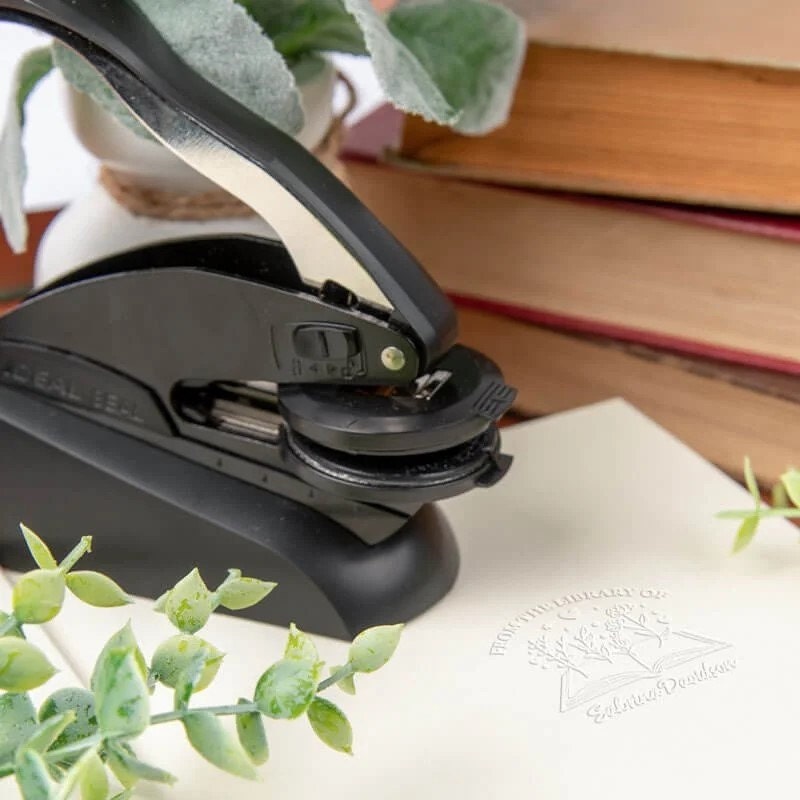
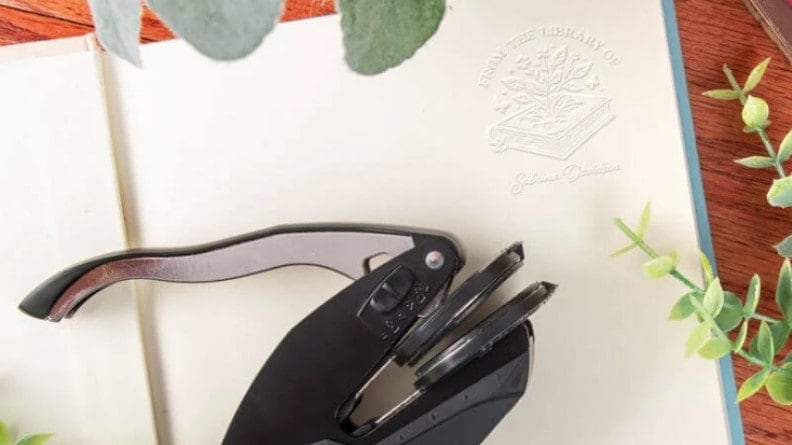
Let’s start with the basics. A book embosser is a tool used to create a raised design or seal on paper—kind of like an official stamp, but fancier! Instead of ink, it leaves an impression on the page. With customizable embossing plates, you can add your name, a logo, or any unique design you like. Embossers are commonly used in personal libraries, law offices, and schools, bringing a little extra elegance to the everyday.I personally love the way it turns my humble book collection into something that feels more refined. It’s perfect for anyone who treasures books and wants to mark them as their own. Every time I run my fingers over that raised seal on my favorite novel, it gives me that same satisfying feeling—like my mark has been immortalized in the pages.

How to Use an Embosser
If you’ve never used a book embosser before, don’t worry—it's super simple! You’ll need a bit of practice to get a perfectly crisp impression, but you’ll be a pro in no time. Let’s break it down step by step on how to use a book embosser:
Step 1: Position Your PageFirst, decide where in the book you want to emboss (we’ll talk about popular spots later). Open the book to that page, making sure it’s flat.
Step 2: Align the EmbosserNext, take your book embosser and center it on the page. Since embossers are usually handheld, this is where a steady hand helps. It might take a few tries to get it perfectly straight.
Step 3: Press FirmlyHere’s the part where I’ve messed up a few times! You need to press down firmly with one hand while holding the page steady with the other. Apply even pressure across the whole embosser for a clear impression.
Step 4: Lift GentlyCarefully release the handle and lift the embosser. Be sure not to pull too quickly, or you might smudge the raised design.Pro Tip: After a few tries, you’ll get a feel for just how much pressure you need. I found that after practicing on scrap paper a couple of times, I started to get consistently good results.
How to Assemble a Book Embosser
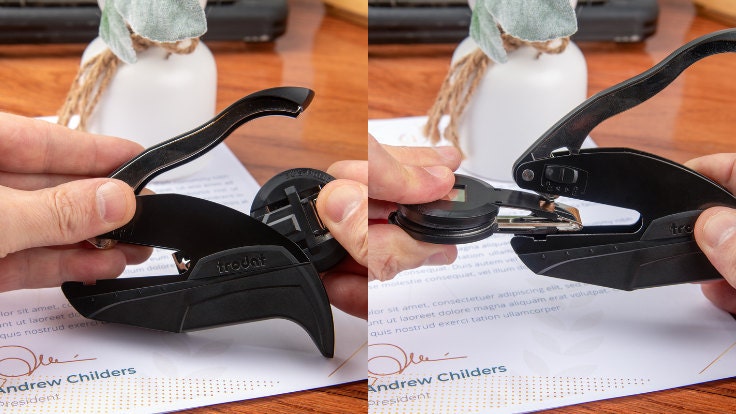
When you get your book embosser, it usually comes in a few separate parts: the handle, two embossing plates, and sometimes a base. Don’t worry—it’s not as tricky as assembling flat-pack furniture! Here’s how to put it together:
Step 1: Identify the PlatesYou’ll find two plates in your kit—one has a raised design, and the other has a matching recessed design. These work together to create that perfect raised impression.
Step 2: Insert the PlatesCarefully insert the plates into the embosser. The raised side of one plate should meet the recessed side of the other. Make sure they’re aligned properly.
Step 3: Secure the PlatesDepending on the model, you’ll either snap or screw the plates into place. Double-check that everything is secure.
Step 4: Test Your EmbosserBefore using the embosser on your precious books, test it on a piece of scrap paper. This will help you confirm the plates are aligned properly and give you a chance to adjust any issues before embossing your prized collection.Troubleshooting Tip: If your impression looks faint, you may need to apply more pressure or adjust the plates slightly. If it’s uneven, double-check that the plates are fully aligned and locked in place.
Which Page Should You Emboss?
Choosing the right page to emboss is totally up to you. Here are some of the most common spots people like to emboss:
Inside CoverEmbossing the inside cover or first blank page is a classic option. It’s discreet and doesn’t interfere with the text, but it still makes a statement when you open the book.
Title PageThis is the spot I tend to favor when I want the embossing to be more visible. Adding your mark to the title page gives it a prominent place without disrupting the flow of the text.
Midway or Back PagesFor a more subtle touch, you might choose to emboss midway through the book or near the back. It’s like a secret signature that only you know is there.
Top or Bottom?When it comes to orientation, it’s all about preference. Some people like to emboss the top of the page, while others prefer the bottom. Try a few options on scrap paper to see what looks best for you.
How to Make Your Embossing More Visible
One thing to note about embossing is that, while elegant, it can sometimes be hard to spot on the page. If you want your embossed design to stand out more, consider using a seal inker. A seal inker is a small ink pad that you lightly press over the raised design to make it pop. I tried this on a few of my books, and the difference was noticeable—it adds that extra layer of visibility without compromising the sophistication of the embossed design.
Why You Should Use a Book Embosser
At first, I was skeptical about getting a book embosser. I thought, “Do I really need this?” But after using it on my collection, I realized it’s not just about marking ownership; it’s about adding a touch of personality and style to something you love.A custom book embosser makes each book in your collection feel unique. It’s especially great for gifting. I once embossed a set of classic novels as a wedding gift for a friend, and it was such a hit. The couple said it made the gift feel extra special and personalized—something they wouldn’t forget.For book collectors, an embosser is a charming way to express ownership. Whether you’re marking a first edition or just a personal favorite, it adds that extra something.
Conclusion: Make Your Collection Truly Yours
A book embosser is more than just a practical tool—it’s a way to connect with your books on a deeper level. Whether you're using it to personalize your personal library, impress a loved one with a custom gift, or simply elevate your collection, a book embosser is the perfect addition to any book lover’s toolkit.Now that you know how to use, assemble, and choose the best pages for embossing, you’re ready to make each book in your collection uniquely yours. Trust me—once you start embossing, you won’t want to stop. Happy embossing!

